How to Integrate Stripe with Brevo (Sendinblue): Complete Setup Guide
Learn how to automatically sync your Stripe customers to Brevo email lists in minutes. This comprehensive guide covers basic setup, advanced product-based segmentation, and best practices for maximizing your email marketing ROI.

Table of Contents
Why Integrate Stripe with Brevo?
Connecting your Stripe payment platform with Brevo (formerly Sendinblue) email marketing service creates a powerful automation workflow that saves time and increases revenue. Here's what you can achieve:
Automated List Building
Automatically add new Stripe customers to your Brevo email lists without manual CSV exports or data entry.
Product-Based Segmentation
Send targeted campaigns based on which products customers purchased, creating highly relevant messaging.
Real-Time Synchronization
Customers are synced instantly after purchase, enabling immediate welcome emails and onboarding sequences.
Video Tutorial: Complete Walkthrough
Watch this 5-minute tutorial for a complete visual walkthrough of setting up your Stripe to Brevo integration. We'll cover installation, configuration, and testing your first sync.
Pro Tip: Pause the video at each step to follow along in your own Stripe dashboard. This hands-on approach ensures you don't miss any configuration details.
Prerequisites
Before you begin, make sure you have the following:
- Active Stripe Account: You need admin access to install apps from the Stripe App Marketplace
- Brevo Account: Free or paid plan (all plans supported)
- Brevo API Key: We'll show you how to generate this in Step 2
- Brevo Lists: Create your email lists in Brevo before syncing (e.g., "All Customers", "Premium Members", "Course Buyers")
Step 1: Install MailSync for Brevo
MailSync is available in the official Stripe App Marketplace. Installation takes less than 30 seconds:
- 1
Navigate to the MailSync app listing in the Stripe App Marketplace, or search for "MailSync Brevo" in your Stripe dashboard under Apps.
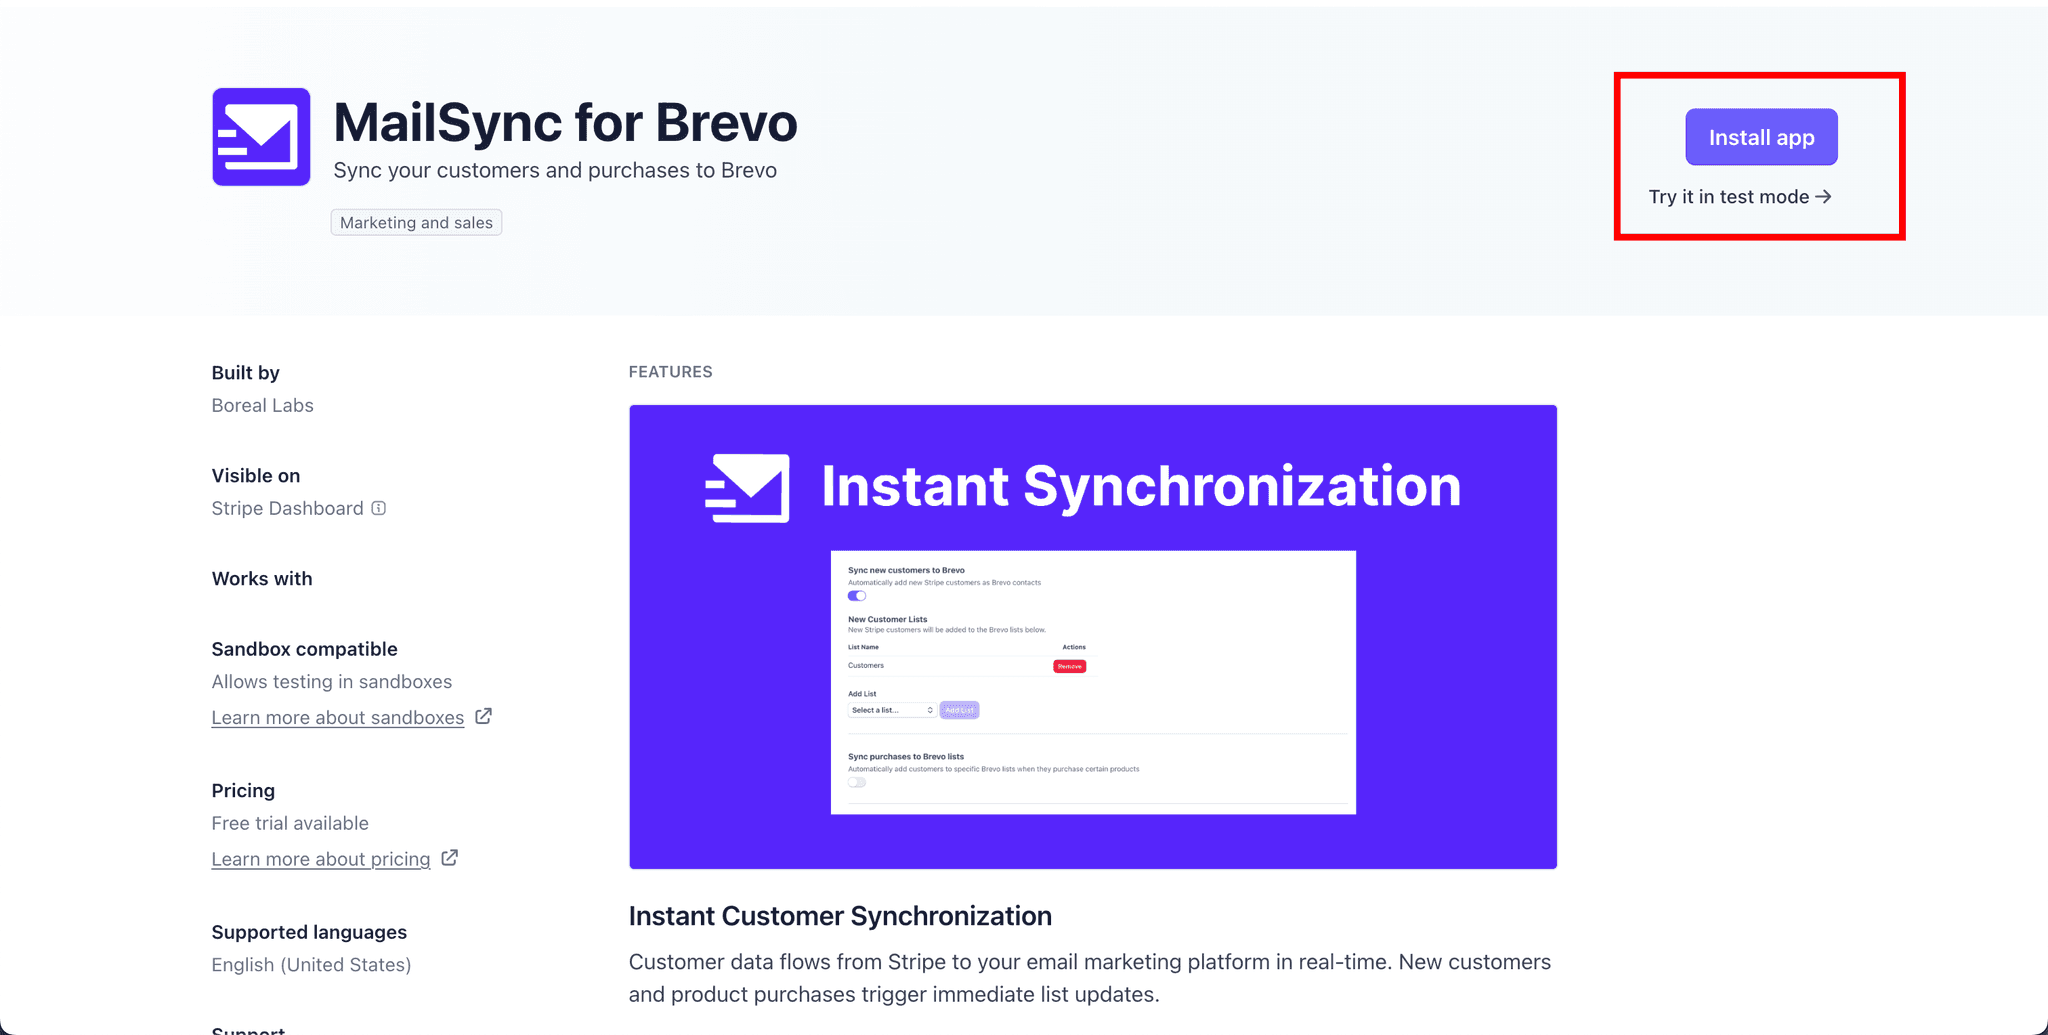
- 2
Click the "Install app" button. Stripe will ask you to confirm which Stripe account you want to install it on (if you manage multiple accounts).
Note: MailSync requires permission to read customer data and payment information. This is necessary to sync customer details to Brevo.
- 3
After installation completes, you'll be automatically redirected to the MailSync initial setup page. Enter your email address to get started. This email will be used for important notifications and support.
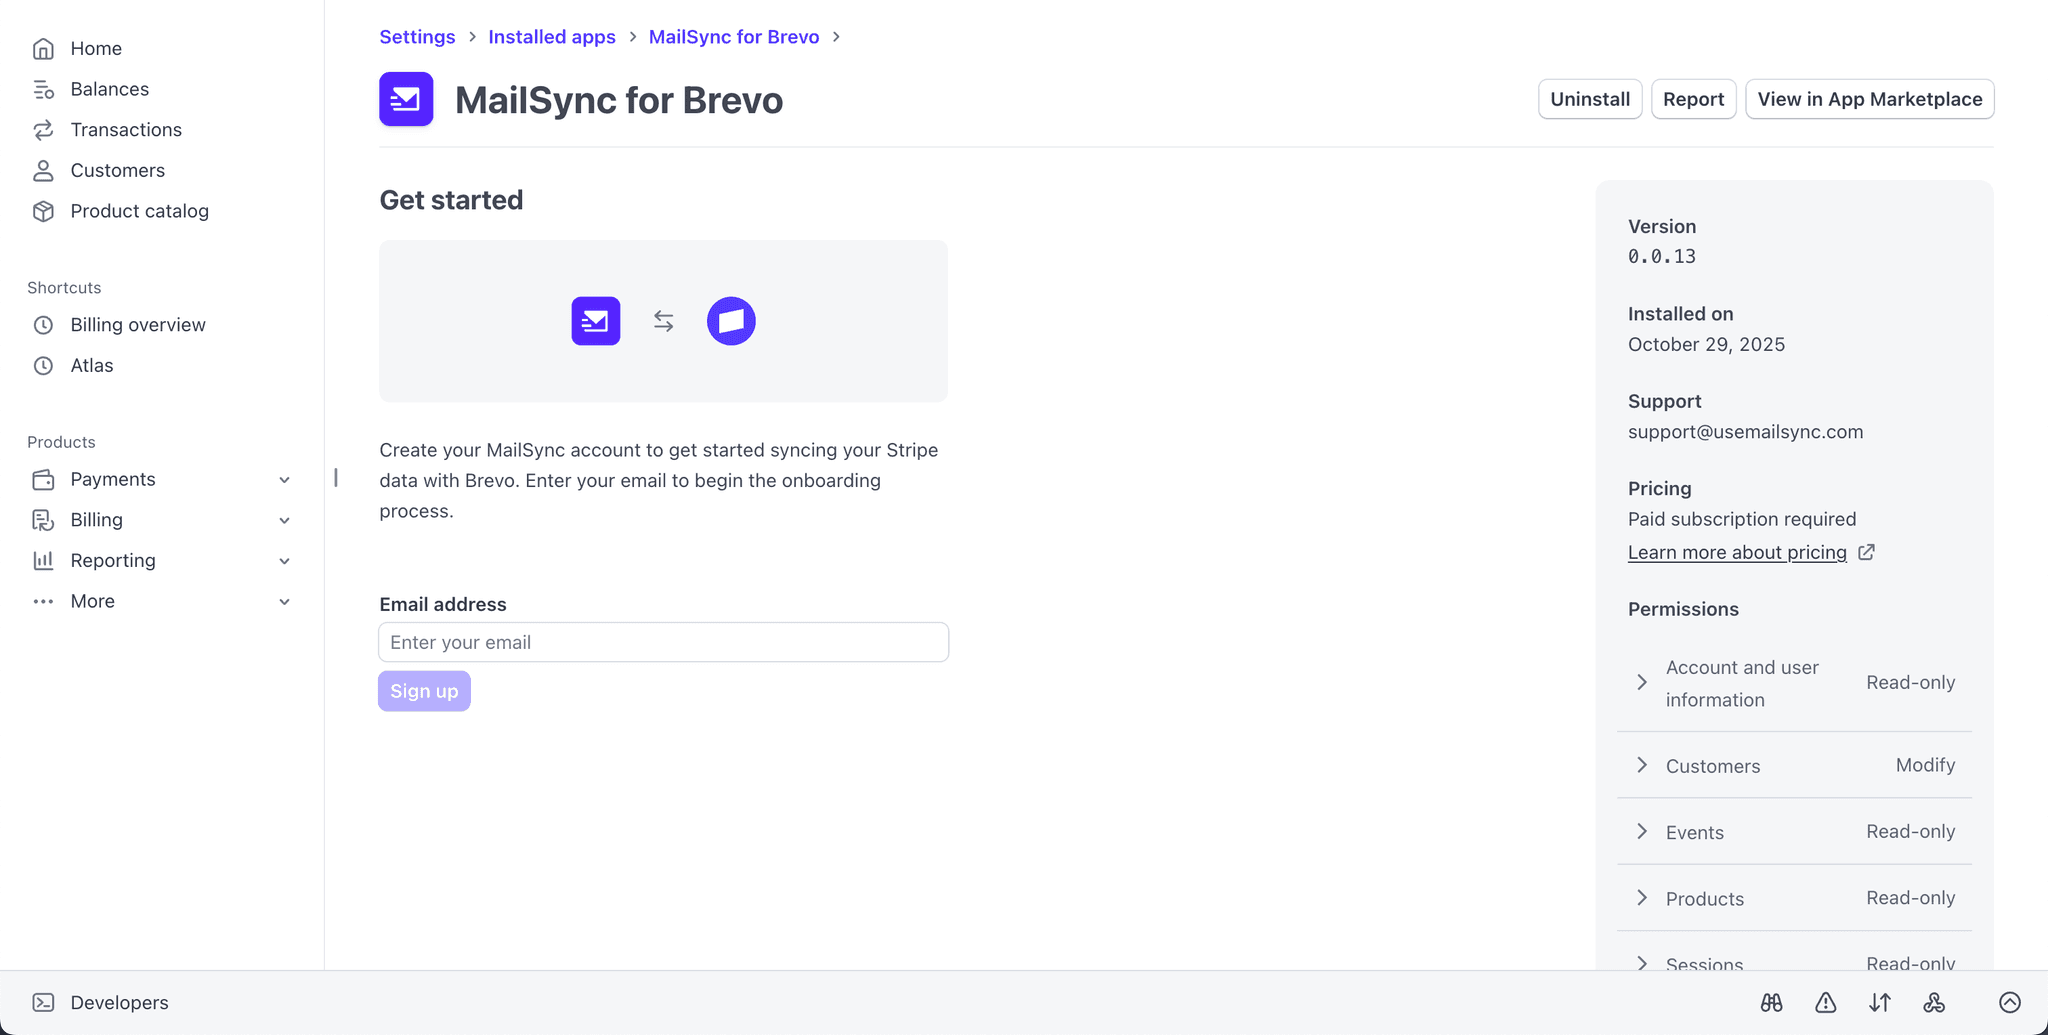
- 4
After submitting your email, you'll be taken to the MailSync settings page. You're now ready to connect Brevo!
Step 2: Connect Your Brevo Account
To enable communication between Stripe and Brevo, you'll need to provide your Brevo API key:
- 1
In the MailSync settings page, click "Edit Connection" in the Brevo Connection section.
- 2
Open a new browser tab and log in to your Brevo dashboard.
- 3
Navigate to Settings → SMTP & API (or visit https://app.brevo.com/settings/keys/api).
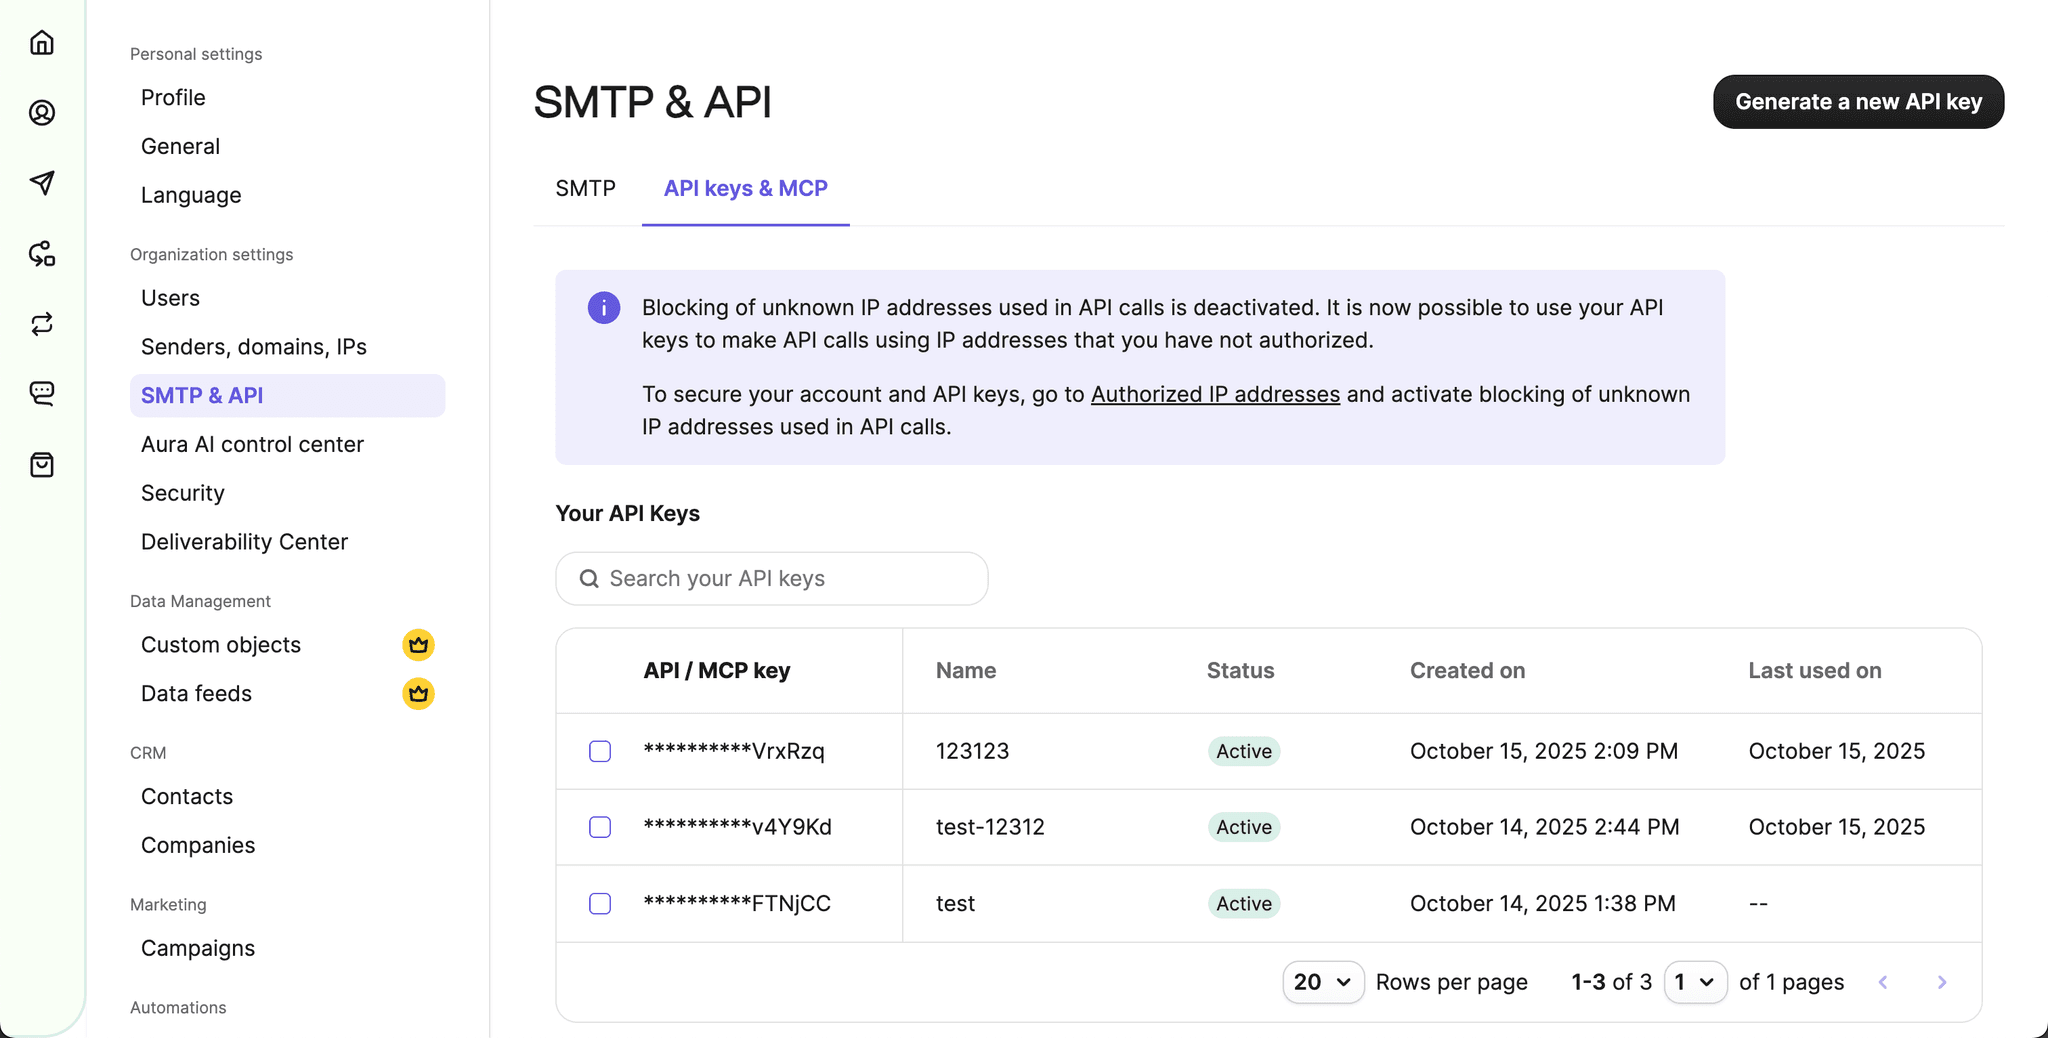
- 4
Click "Generate a new API key". Give it a descriptive name like "MailSync Integration" so you can identify it later.
Security Best Practice: Use a separate API key for each integration. This makes it easier to revoke access if needed without affecting other services.
- 5
Copy the generated API key (it starts with "xkeysib-") and paste it into the MailSync settings page.

- 6
Click "Save API Token". MailSync will verify the connection. If successful, you'll see a green checkmark and "Connected to Brevo" status.
Tip: If you see a popup saying "Your API key is not valid." double-check the API key you entered and ensure it is correct.
Step 3: Configure Customer Sync
This section allows you to automatically add ALL Stripe customers to specific Brevo lists.
- 1
In the MailSync settings page, toggle on "Sync new customers to Brevo". This activates automatic syncing for all new customers.
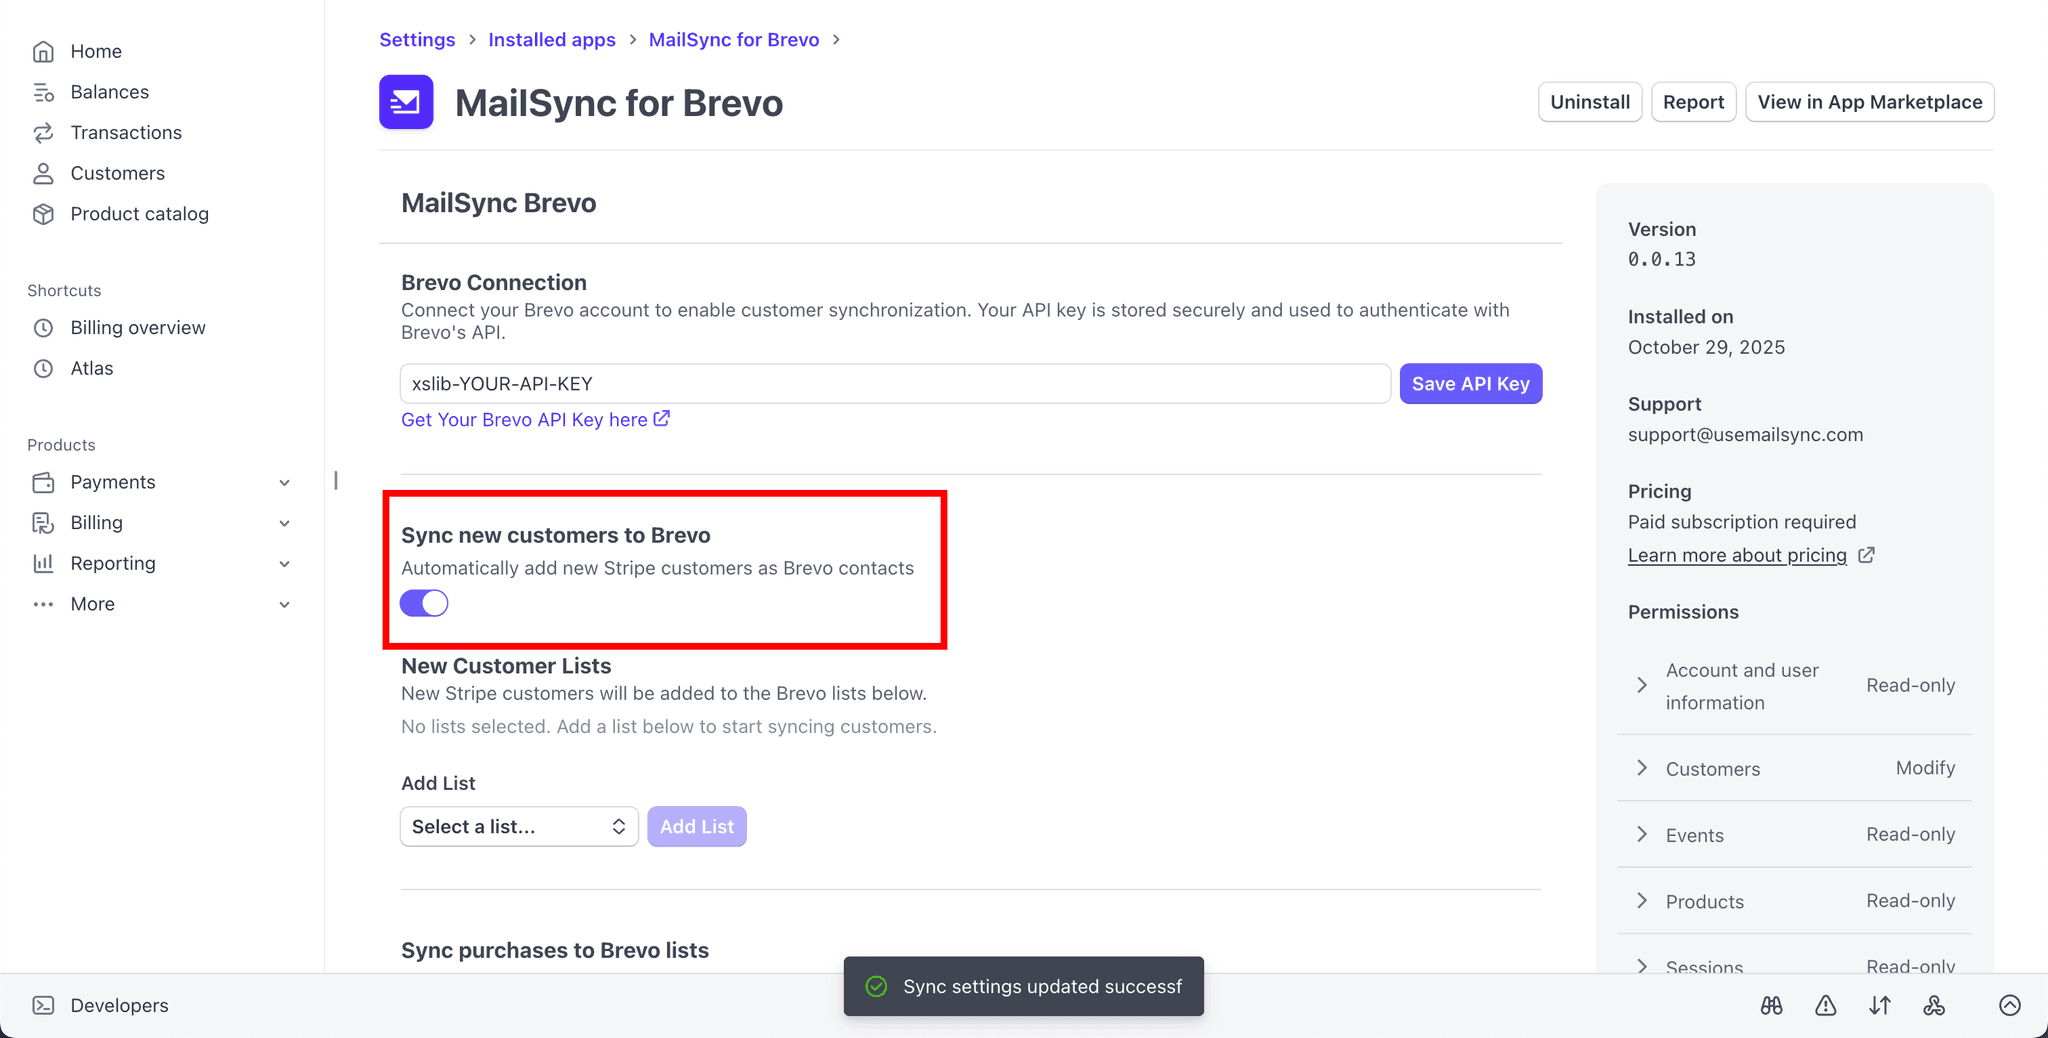
- 2
Click the "Choose a list" dropdown. You'll see all your existing Brevo lists. Select the list(s) where you want all customers added (for example, "All Stripe Customers" or "Newsletter").
- 3
Click "Add List". You can add multiple lists by repeating this process.
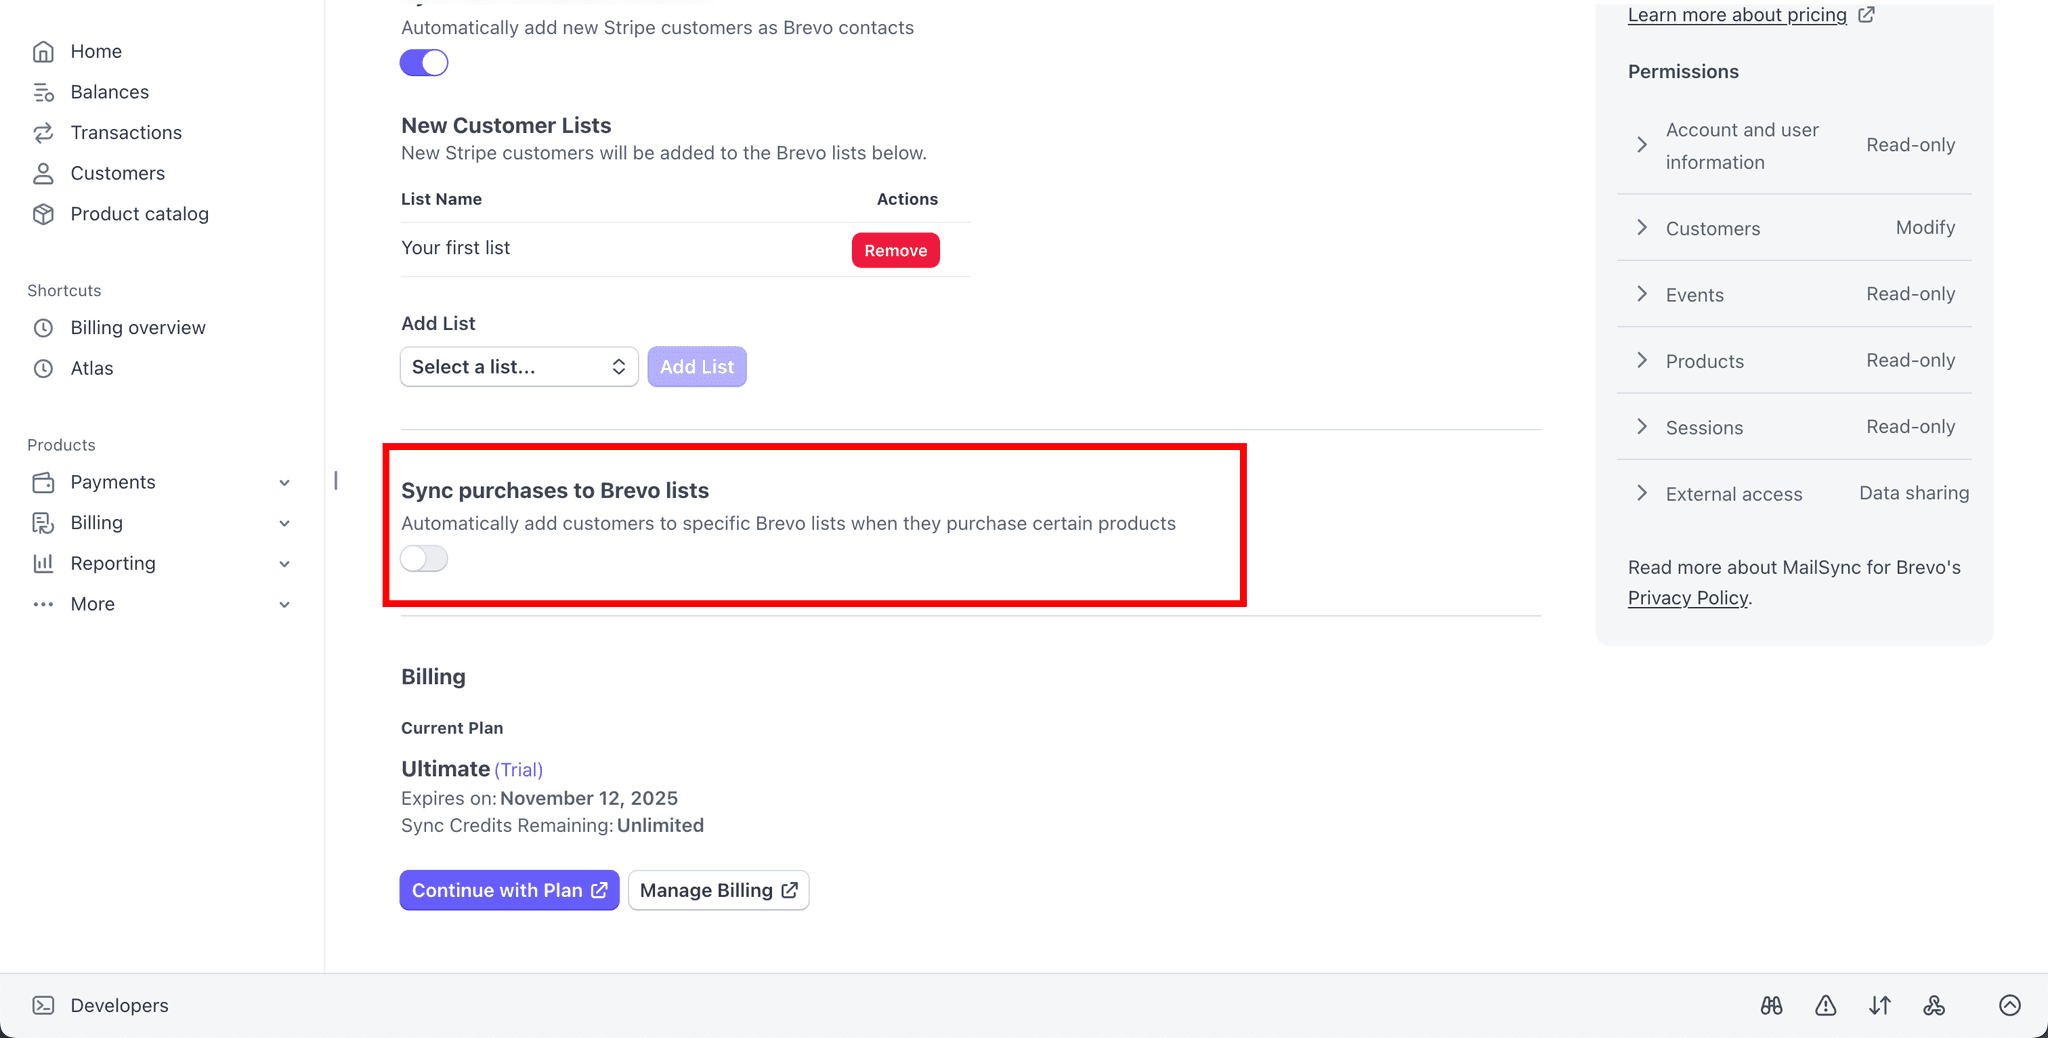
Step 4: Advanced Product-Based Segmentation
This is where MailSync becomes incredibly powerful. Instead of just adding all customers to one list, you can automatically segment them based on which Stripe products they purchased:
Real-World Example
If you sell an online course for $99 and a coaching program for $599, you can automatically add course buyers to a "Course Students" list and coaching buyers to a "Premium Coaching" list. This allows you to send targeted onboarding emails, exclusive offers, and relevant content to each segment.
- 1
In the MailSync settings page, toggle on "Sync purchases to Brevo lists". This enables product-based syncing.
- 2
Under "Add Product Mapping", use the "Select Product" dropdown to choose a Stripe product you want to map.
- 3
Use the "Select Brevo List" dropdown to choose which Brevo list customers should be added to when they purchase this product.
Tip: You don't need to map every product. Only map the products where you want product-specific segmentation.
- 4
Click the "Add Mapping" button to save this product-to-list mapping.
- 5
Repeat steps 2-4 for each product you want to map to a specific Brevo list. Each product can be mapped to a different list for precise segmentation.
Step 5: Test Your Integration
Test your integration by creating a customer in Stripe and checking if they appear in Brevo:
- 1
Make sure that the "Sync new customers to Brevo" and "Sync purchases to Brevo lists" are toggled on in your MailSync settings.
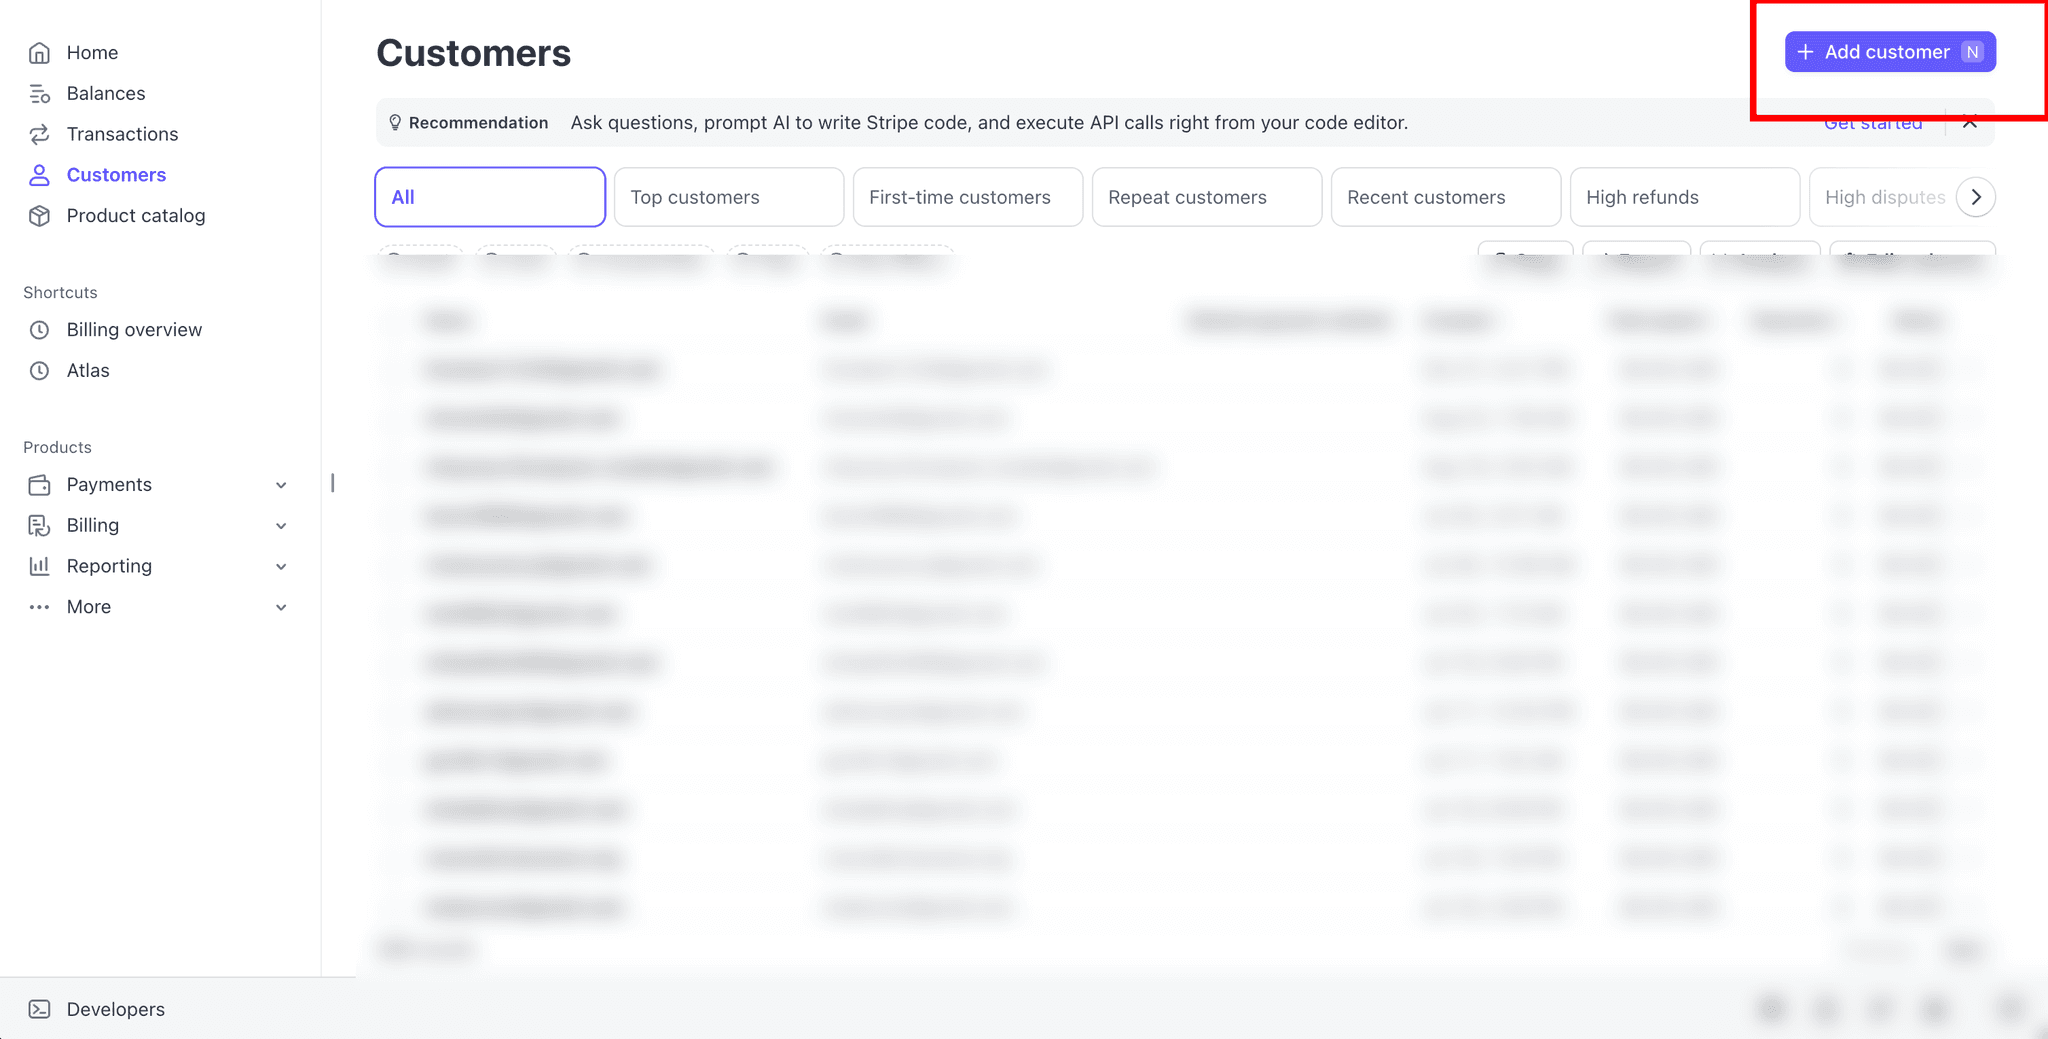
- 2
In Stripe, go to Customers → "Add customer" and create a customer with your email address.
- 3
Wait 10-30 seconds, then visit https://app.brevo.com/contact/list to check if your contact was added.
Success! Once you've confirmed the sync works, your integration is live. All future Stripe customers will be automatically synced to Brevo in real-time.
Best Practices & Advanced Use Cases
1. Create a Segmented List Strategy
Don't put all customers in one giant list. Create specific lists for different customer journeys:
- •"All Customers" - General announcements
- •"New Customers" - Onboarding sequences
- •"Product A Buyers" - Product-specific tips
- •"VIP Customers" - Exclusive offers for high spenders
2. Set Up Automated Welcome Sequences
In Brevo, create automation workflows that trigger when a customer is added to a list. Send a welcome email immediately, followed by onboarding content over the next week. This dramatically improves customer retention and product adoption.
3. Monitor Sync Performance
Set up Brevo's email notifications for list growth so you're alerted when new customers are added. You can also periodically check your Brevo lists to verify syncs are happening correctly.
4. Respect GDPR and Privacy Laws
Ensure your Stripe checkout includes proper consent for email marketing. Brevo has built-in GDPR compliance tools. Always include unsubscribe links in your emails and honor opt-out requests promptly.
Troubleshooting Common Issues
Issue: Customers aren't syncing to Brevo
Possible solutions:
- •Verify your Brevo API key is valid and hasn't been revoked
- •Check that you've toggled on "Enable realtime purchase sync"
- •Ensure the selected Brevo lists exist and haven't been deleted
Issue: Duplicate contacts in Brevo
Possible solutions:
- •Brevo identifies contacts by email address. Duplicates only occur if the email address differs (e.g., capitalization or spacing)
- •Use Brevo's built-in duplicate detection tool to merge duplicates
Issue: Sync is slow (takes several minutes)
Possible solutions:
- •Normal sync time is 10-30 seconds. If it's taking longer, check Brevo's status page for API issues
- •Large lists (100k+ contacts) may experience slower processing
Frequently Asked Questions
Q: Does MailSync sync historical customers or only new ones?
A: By default, MailSync only syncs customers from the moment you enable it (forward-looking). If you need to import historical customers, you can use Brevo's CSV import feature or contact MailSync support about bulk import options.
Q: What happens if a customer refunds or cancels?
A: Currently, MailSync does not automatically remove customers from lists upon refund. You can set up Stripe webhooks or manually manage refunded customers in Brevo if needed.
Q: Can I sync subscription customers differently than one-time purchase customers?
A: Yes! Stripe treats subscriptions as products. You can map subscription products to specific Brevo lists just like any other product. For example, add "Monthly Subscribers" to one list and "Annual Subscribers" to another.
Q: Is there a limit to how many customers can be synced?
A: MailSync has no hard limits. Your Brevo plan determines your contact storage limits. Free plans typically allow 300 contacts, while paid plans support unlimited contacts.
Q: How should I test the integration before using it with real customers?
A: Simply ensure "Enable realtime purchase sync" is toggled ON with at least one Brevo list selected. Then go to Customers in your Stripe dashboard, click "Add customer", and enter a test email address. Wait 10-30 seconds, then check your Brevo list to see if the contact was created. This is the easiest way to verify everything is working correctly.
Q: Does MailSync support Stripe Checkout and Payment Links?
A: Yes! MailSync works with all Stripe payment methods: Checkout, Payment Links, Invoices, and custom integrations using the Stripe API.
Ready to Automate Your Customer Syncing?
Install MailSync for Brevo from the Stripe App Marketplace and start syncing your customers automatically in the next 5 minutes. No coding required, no monthly fees for basic features.